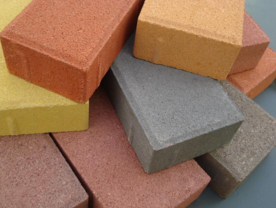
Fired bricks have become a common building material in our daily lives, with a wide range of applications that are directly related to their excellent properties. Their ability to fully utilize their advantages is related to construction. Do you know their paving process?
1. Preparation work: Based on the construction drawings, deepen the layout, carefully check the dimensions and methods of each node, and calculate the dimensions of each detailed part.
2. Base treatment: Clean up the debris (film, soil, floating ash, etc.) on the cushion layer, check for hollowing on the base layer, and if there is hollowing, cut off and pour again.
3. Trial assembly: Before starting the paving process, conduct a trial assembly of the patterns, colors, and spellings in the installation drawings of the fired bricks. If encountering inspection wells, non whole blocks should be arranged at the corners and neatly arranged.
4. Dividing lines: To control the accuracy and quality of paving, ink lines should be drawn on the cushion layer first, and control lines should be made in advance before paving. Records should be kept and the control lines should be checked for displacement at any time. The surface layer elevation should also be found based on the design elevation and elevation control lines should be made.
5. Trial laying: Lay two dry hard ash strips in two vertical directions, with a width greater than the width of the bricks, 3cm ≤ thickness ≤ 5cm. Based on the construction layout plan, actual dimensions on site, and the designed paving style, arrange the bricks in order, check whether the gaps between the panels can meet the design requirements, verify whether the trial laying sample can meet the proposed effect, and notify Party A to confirm on site.
6. Formal laying: According to the on-site cross control line, lay one line vertically and horizontally as the standard for large-area laying. Based on the confirmed sample of trial assembly and the gap of trial paving (gap ≤ 3mm), start paving at the intersection of the control lines. First, try laying, that is, lift the fired bricks, align the longitudinal and transverse control lines, and lay them on the already laid dry and hard mortar leveling layer, then use a rubber hammer to strike. After compacting the mortar to the paving height, move the bricks aside and check if the mortar surface matches the boards. If there are any voids, fill them with mortar and then proceed with the formal paving. Use a rubber mallet to strike. After compacting the mortar to the paving height, move the bricks aside and check if the mortar surface matches the boards. If there are any voids, fill them with mortar and then proceed with the formal paving.
The main steps for laying fired bricks are the above steps. In practical operation, we should pay attention to every small detail to avoid product damage caused by improper methods. We hope the above content can be helpful to everyone.
Editor: Becky

